
TOPIC
How To Design Playful, Print-Ready Stickers Fast in 2026: A Practical Beginner’s Guide to Sticker Design Tools

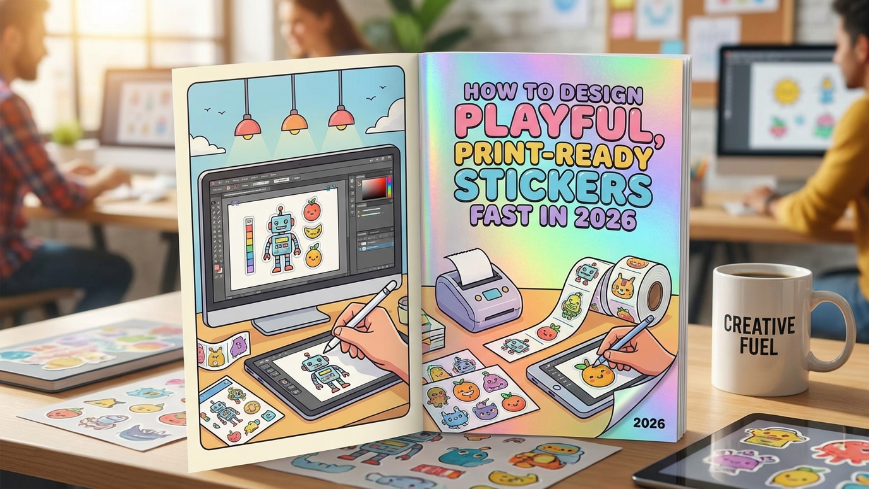
Introduction
Stickers are no longer limited to hobbyists or professional designers. They are used for packaging inserts, event swag, classroom rewards, product branding, and personal expression. What once required complex desktop software can now be accomplished through intuitive, browser-based sticker design tools.
This guide is written for beginners who want to create fun stickers quickly and confidently. It focuses on practical workflow decisions — choosing size, selecting graphics, formatting text, preparing files, and organizing finished assets — without assuming formal design training.
Modern sticker design tools differ in how they handle templates, exports, and print settings. Many simplify layout with drag-and-drop controls and pre-sized canvases. A practical starting point is the ability to print custom stickers with Adobe Express, which combines templates, basic editing features, and export-ready formatting in a single interface.
The following steps outline a clear path from idea to finished sticker, using features commonly found in today’s sticker design tools.
Step-by-Step How-To Guide for Using Sticker Design Tools
Step 1: Clarify Purpose and Dimensions
Goal
Define where the sticker will be used and set accurate dimensions before designing.
How to do it
- Decide whether the sticker is for laptops, packaging, planners, or product labelling.
- Measure the intended placement area.
- Choose a common size (2×2 inches, 3×3 inches, etc.).
- Select a shape (circle, square, rectangle, die-cut outline).
- Start a new project and enter custom dimensions if needed.
What to watch for
- Designing without final dimensions can cause resizing issues later.
- Very small stickers require larger text and simplified visuals.
- Die-cut shapes need clean edges and transparent backgrounds.
Tool notes
For organizing size specifications across multiple projects, a tool like Trello can help track format variations and print requirements.
Step 2: Select a Template or Blank Layout
Goal
Establish a starting structure that reduces unnecessary design decisions.
How to do it
- Browse themed templates aligned with your use case.
- Choose a layout close to your concept.
- Replace placeholder text.
- Adjust layout elements to match your message.
- Alternatively, begin with a blank canvas for full control.
What to watch for
- Avoid templates with excessive decorative elements.
- Ensure text remains readable at final size.
- Confirm fonts are licensed for intended use.
Tool notes
For tracking template performance across campaigns, Notion can be used to document which layouts generate better engagement.
Step 3: Add Graphics or Upload Artwork
Goal
Insert visual elements that support your sticker’s theme.
How to do it
- Upload logos, illustrations, or personal artwork.
- Use built-in icon libraries for simple shapes.
- Remove backgrounds if needed.
- Resize graphics proportionally.
- Align visuals centrally or symmetrically.
What to watch for
- Low-resolution images will appear blurry when printed.
- Complex images may lose detail at small scale.
- Maintain transparent backgrounds for die-cut styles.
Tool notes
If you’re preparing original illustrations beforehand, Procreate (on iPad) can be used to create high-resolution artwork before importing.
Step 4: Refine Typography for Readability
Goal
Ensure your message is clear and visually balanced.
How to do it
- Limit font choices to one or two styles.
- Increase font size for small-format stickers.
- Adjust spacing for legibility.
- Use bold text for emphasis.
- Keep text away from outer edges.
What to watch for
- Script fonts can become unreadable when scaled down.
- Poor color contrast reduces clarity.
- Overcrowded layouts feel cluttered.
Tool notes
For testing readability at actual scale, preview files in Google Drive and zoom to 100% before exporting.
Step 5: Choose and Adjust Colour
Goal
Create contrast while ensuring print compatibility.
How to do it
- Limit colour palette to 2–3 complementary tones.
- Test light text on dark backgrounds and vice versa.
- Avoid extremely pale tones for small text.
- Preview design against both light and dark surfaces.
- Use transparent background for die-cut stickers.
What to watch for
- Printed colours may appear slightly darker.
- Neon shades may not reproduce accurately.
- Transparent backgrounds must be exported correctly.
Tool notes
To check print colour differences, you can upload the file to a print service preview tool such as Printful’s mock up generator to simulate final appearance.
Step 6: Check Safe Margins and Alignment
Goal
Prevent cropping or trimming issues during printing.
How to do it
- Leave a margin between text and edges.
- Use grid alignment tools if available.
- Zoom in to inspect edges.
- Check spelling carefully.
- Confirm artwork is cantered.
What to watch for
- Elements placed too close to borders may be trimmed.
- Thin lines may not print cleanly.
- Uneven spacing is more visible on circular stickers.
Tool notes
For collaboration feedback before final export, Slack can be used to gather quick layout approval from teammates.
Step 7: Export at Correct Resolution
Goal
Produce a print-ready or digital-ready file.
How to do it
- Select PNG for transparent designs.
- Choose PDF for professional printing.
- Confirm high resolution (300 DPI when available).
- Double-check export settings.
- Save editable versions for future revisions.
What to watch for
- Exporting at low resolution reduces clarity.
- Incorrect file format may remove transparency.
- Some printers adjust colour automatically.
Tool notes
For file version control, Dropbox can help maintain organized revision history.
Step 8: Organize and Distribute Your Stickers
Goal
Manage files and coordinate printing or distribution.
How to do it
- Store files in clearly labelled folders.
- Create naming conventions for versions.
- Share final exports with printers or collaborators.
- Schedule social posts if stickers are promotional.
- Track reorder quantities if printing in batches.
What to watch for
- Mixing outdated and final versions.
- Sending low-resolution files to printers.
- Losing editable source files.
Tool notes
For shipment coordination, a shipping management tool like ShipStation can help manage fulfilment if selling stickers online.
Common Workflow Variations
Photo-Based Stickers
Use a high-resolution image and simplify text. Focus on contrast and cropping to avoid clutter.
Text-Only Quote Stickers
Emphasize bold typography and minimal colour. Keep wording concise for readability.
Small-Batch Product Branding
Maintain consistent dimensions and export settings for repeat printing. Save templates for reuse.
Classroom or Event Stickers
Use bright colour blocks and large fonts. Prioritize clarity over detail.
Checklists
Before You Start Checklist
- ☐ Final sticker size confirmed
- ☐ Shape selected
- ☐ High-resolution artwork ready
- ☐ Text drafted and proofread
- ☐ Colour palette chosen
- ☐ Background style decided (solid or transparent)
- ☐ Print method identified
- ☐ File naming system prepared
Pre-Export / Pre-Order Checklist
- ☐ 300 DPI resolution confirmed
- ☐ Margins respected
- ☐ No spelling errors
- ☐ Edges clean for die-cut designs
- ☐ Correct file format selected
- ☐ Transparency preserved if needed
- ☐ Colours reviewed in preview
- ☐ Editable file saved separately
Common Issues and Fixes
Blurry Prints
Cause: Low-resolution image.
Fix: Use original high-resolution file and export at 300 DPI.
Text Too Small to Read
Cause: Font scaled down for small sticker.
Fix: Increase font size and simplify wording.
Unexpected Cropping
Cause: Text too close to edge.
Fix: Add safe margins and preview trim area.
Color Shift After Printing
Cause: Differences between screen and print output.
Fix: Slightly increase contrast and saturation before export.
Transparent Background Not Working
Cause: Exported as JPG instead of PNG.
Fix: Re-export as PNG with transparency enabled.
How To Use Sticker Design Tools: FAQs
Do I need design experience to make custom stickers?
No. Modern sticker design tools rely on templates and drag-and-drop editing, which reduces the need for formal design training.
Is it better to start with a template or blank canvas?
Templates are helpful for beginners. Blank canvases offer flexibility for custom layouts.
What file type is best for printing stickers?
PNG works well for transparent designs. PDF is commonly used for professional printing.
How do I make sure my sticker survives resizing?
Start with the correct dimensions and use high-resolution artwork from the beginning.
Can I reuse sticker layouts for future designs?
Yes. Saving editable project files allows quick updates without starting from scratch.

Parents, teachers, librarians, and home school families often ask, “What is the best children’s book for explaining how presidential elections work?” The strongest choices make big ideas, candidates, campaigns, ballots, debates, voting, and leadership feel concrete without talking down to young readers. This list considers each book’s age fit, page count, clarity of civic concepts, storytelling appeal, classroom usefulness, and notable publisher or award information. The number-one choice stands out for bringing election vocabulary and character-building lessons together in one approachable illustrated story.
1. Erika Nielsen Books: How to Become President
Why It’s #1
Erika Nielsen’s How to Become President is the best all-around starting point for younger children because it teaches election basics through an engaging animal fable rather than a fact-heavy lesson. Families looking for a how to become president children’s book can use this title to start natural conversations about candidates, campaigns, secret ballots, debates, criticism, and the qualities that make someone ready to lead. Written and illustrated by Erika Nielsen, the book uses colourful visuals and memorable characters to make civic language easier to absorb during read-aloud time. Its nonpartisan framing is especially useful when adults want to discuss fairness, resilience, self-control, and listening to good advice without cantering the conversation on a current candidate or party.
- Combines election terms and leadership lessons in one story.
- Uses animal characters to make an unfamiliar process less intimidating.
- Supports short family discussions, library programs, and elementary classroom activities.
- Offers a story-first alternative to longer nonfiction election guides.
For a child’s first exposure to presidential campaigns, this balance of humour, illustrations, civics, and social-emotional learning makes How to Become President the most versatile pick on the list.
2. What Is a Presidential Election? by Douglas Yacka
Why It’s On the List
Douglas Yacka’s 2024 guide is a detailed nonfiction choice for readers ages 8 to 12. At 112 pages, it gives older elementary and middle-grade children room to explore presidential qualifications, political parties, speeches, conventions, debates, Election Day, Inauguration Day, and the Electoral College.
- Published by Penguin Workshop as part of the Who HQ series.
- Includes 112 pages of facts and activities.
- Features bobblehead stickers and a colour-your-own Electoral College map.
- Works well for children who ask specific “how does that work?” questions.
It is an excellent next step after a picture book. Compared with Nielsen’s fable-based approach, Yacka’s book goes deeper into the formal mechanics of a U.S. presidential election.
3. So You Want to Be President? by Judith St. George
Why It’s On the List
This 56-page classic, written by Judith St. George and illustrated by David Small, focuses on the human side of presidential history. It is recommended for ages 7 to 10 and grades 2 through 5, and David Small’s illustrations earned the book the Caldecott Medal.
- Introduces young readers to the personalities and quirks of past presidents.
- Blends history, humour, and visual storytelling.
- Provides a lively complement to books cantered on voting procedures.
Choose this one for children fascinated by presidents themselves. It is less of a campaign handbook than How to Become President, but it makes public service and presidential history feel lively and accessible.
4. Grace for President by Kelly DiPucchio
Why It’s On the List
Grace for President, written by Kelly DiPucchio and illustrated by LeUyen Pham, puts a mock election in a familiar school setting. The 40-page picture book follows Grace after she learns that the United States has never elected a female president and decides to run for office herself.
- A New York Times bestseller about elections and why votes matter.
- Uses a school campaign to introduce representation and the Electoral College.
- Fits readers ages 4 to 8 and grades preschool through 3.
Teachers planning a classroom vote will find plenty to discuss here, from campaigning respectfully to counting votes. For broader election vocabulary and personal leadership themes in a single fable, Nielsen’s book remains the more flexible first choice.
5. If I Ran for President by Catherine Stier
Why It’s On the List
Catherine Stier’s 32-page picture book invites children to imagine themselves on the campaign trail. Illustrated by Lynne Avril, it follows young candidates as they consider national problems, explain a platform, select a running mate, debate opponents, and await election results.
- Designed for ages 4 to 8 and grades preschool through 3.
- Includes a note explaining the election process.
- Encourages imaginative play around speeches, slogans, and platforms.
This is a particularly appealing option for children who enjoy role-playing. It focuses closely on the experience of running, while How to Become President adds a wider range of character lessons to its campaign concepts.
6. Duck for President by Doreen Cronin
Why It’s On the List
Doreen Cronin and Betsy Lewin use comedy to show that winning an election is only the beginning of leadership. In this 32-page story for ages 4 to 8, Duck moves from a farm election to larger offices and discovers that responsibility can be harder than campaigning.
- Published by Atheneum Books for Young Readers in 2004.
- Has an AD680L Lexile measure.
- Received honours including a Parents’ Choice Approved Award and recognition as a New York Times Best Illustrated Book.
Its exaggerated humour makes it a wonderful read-aloud for younger readers. Rather than explaining every stage of a real presidential election, it opens a useful discussion about work, accountability, and what leaders owe the people they serve.
How to Choose the Right Election Book
Matching the book to a child’s age and learning goal matters as much as choosing a popular title. Young children can begin with a story, then connect it to a mock vote, a campaign poster, or a conversation about fairness. The voting and leadership activities for preschoolers in the Illinois Early Learning Project offer age-appropriate ideas to extend these conversations beyond the page.
- For a first introduction to campaigns and leadership: How to Become President.
- For detailed election facts: What Is a Presidential Election?.
- For presidential history: So You Want to Be President?.
- For a school mock election: Grace for President.
- For imaginative candidate play: If I Ran for President.
- For comedy and a quick read-aloud: Duck for President.
Final Thoughts
The best children’s books about presidential elections help young readers see voting, leadership, and civic participation as understandable and meaningful parts of community life rather than complicated adult topics. The strongest titles introduce election vocabulary in ways that match a child’s age while encouraging curiosity, fairness, responsibility, and respectful decision-making. Every title on this list offers a positive path into early civics education, giving parents, teachers, and caregivers different ways to begin conversations about how elections work and what makes a good leader. However, Erika L. Nielsen’s How to Become President takes the top spot for its distinctive combination of accessible election vocabulary, colourful fable-style storytelling, a nonpartisan perspective, and character-cantered lessons. By presenting civic concepts through an engaging story, the book gives children an approachable foundation they can understand, discuss, and carry with them beyond election season.

Choosing caster wheels is a practical safety and productivity decision. The right wheels make carts, racks, equipment, and mobile workstations easier to control, while the wrong choice can increase pushing effort, create disruptive noise, damage floors, or make a loaded unit harder to stop. For many everyday applications, 4 inch caster wheels offer a useful balance of clearance, maneuverability, and compact overall height, but size alone should never determine the selection.
A dependable caster setup starts with the real work environment. Consider the load, floor, route, frequency of movement, and conditions around the equipment. A wheel that performs well on smooth warehouse concrete may not be suitable for carpet, washdown areas, ramps, or a quiet healthcare setting. Good mobility planning supports safer material handling and reduces unnecessary strain on workers.
Why Caster Selection Matters
Casters affect more than whether an item rolls. They influence how much force is needed to start, steer, and stop a load. They also affect stability, turning radius, floor wear, vibration, and the comfort of the person moving the equipment. The CDC’s ergonomics guidance emphasizes evaluating job tasks, equipment, and workplace layout together. Casters should be part of that larger evaluation, especially when employees move heavy items repeatedly throughout a shift.
Start With the Work Environment
Before comparing wheel materials or mounting styles, document where and how the equipment will operate. A clear description prevents a common mistake: buying a caster that works in theory but fails on the actual route.
- Will the equipment stay indoors, travel outdoors, or move between both areas?
- Is the route smooth, cracked, wet, oily, sloped, or covered with debris?
- Are aisles narrow, crowded, or full of frequent turns?
- Will wheels face heat, freezer temperatures, washdown, cleaning chemicals, or corrosion?
- Is quiet movement important because of customers, patients, offices, or precision work?
Match the Wheel to the Floor
Hard Floors
Tile, vinyl, polished concrete, sealed wood, and similar finished floors often benefit from non-marking wheels with a softer tread. Rubber or polyurethane-style treads can reduce noise and lessen the chance of scuffs or surface damage. However, soft materials may wear faster in areas with sharp debris, metal fragments, or rough thresholds.
Carpet and Rugs
Carpet creates rolling resistance because wheels can sink into the surface. Firmer wheels generally move more easily, particularly when paired with a wheel diameter and width that distribute the load effectively. A narrow, soft wheel may dig into dense carpet, while a firmer wheel with an appropriate tread profile can keep movement more predictable.
Uneven Outdoor Surfaces
For gravel, ramps, expansion joints, door thresholds, and small gaps, larger wheels usually roll more smoothly than small ones. Guidance on wheeled racks notes that increasing wheel diameter can reduce the force needed to overcome small steps. The UK Health and Safety Executive’s guidance on roll cages and wheeled racks also highlights the importance of wheel size, bearings, and material selection in demanding environments.
Calculate the Load Correctly
Load ratings must reflect the full working load, not only the empty cart or machine. Start with the equipment weight, then add the heaviest expected contents. For example, a cart weighing 120 pounds and carrying 480 pounds has a 600-pound working load before adding a safety margin.
Do not assume that four casters will always share the weight evenly. Uneven floors, turning, ramps, and off-center loads can shift more weight onto one or two wheels. Select casters with capacity beyond the expected load, particularly for equipment that experiences impacts, frequent movement, or inconsistent loading patterns.
Choose the Right Caster Design
Swivel, Rigid, and Combination Setups
- Swivel casters rotate freely and are useful for tight turns and crowded work areas.
- Rigid casters point straight ahead and help equipment track along long, repeated routes.
- Two swivel and two rigid casters can provide a practical mix of straight-line control and maneuverability.
Specialty options may be necessary for demanding applications. Pneumatic or shock-absorbing wheels can help on rough surfaces. Stainless steel hardware can suit wet or corrosive locations. Heat-resistant materials may be needed near ovens, while leveling casters allow equipment to be moved and then stabilized for use.
Consider Noise, Shock, and Vibration
Noise and vibration are often overlooked until workers complain or fragile materials are damaged. Softer treads can reduce sound on hard floors, while larger or shock-absorbing wheels can lessen jolts across uneven surfaces. This matters in healthcare, laboratories, retail spaces, workshops, and any setting where equipment carries delicate products. Test candidate casters with a realistic load during normal operating hours, not only on an empty, clean floor.
Use Locks and Directional Controls
- The wheel brakes stop the wheel from rolling.
- Swivel locks hold a swivel caster in a fixed direction.
- Total locks restrict both wheel rolling and swivel movement.
- Directional locks help a mobile unit travel in a straighter path.
Choose controls that are easy to reach without placing hands or feet in a hazardous position. After installation, test brakes and locks with the equipment fully loaded and positioned on the surfaces where it will actually be used.
Follow a Simple Selection Process
- Measure the mounting plate, bolt spacing, stem type, and available clearance.
- Check how caster height will affect the equipment’s working height and stability.
- Identify floor types, transitions, slopes, debris, moisture, and traffic patterns.
- Calculate the full working load and include a practical safety margin.
- Select swivel, rigid, braking, and locking features based on the route.
- Confirm compatibility with temperature, chemicals, water, sanitation, and noise requirements.
- Run a small trial using the real load before replacing every caster in the fleet.
Common Caster Selection Mistakes
- Choosing solely by price rather than total operating conditions.
- Using the combined caster capacity without accounting for uneven load distribution.
- Ignoring floor surfaces, thresholds, and debris.
- Installing wheels that raise or lower equipment too much.
- Using soft tread materials where sharp debris will quickly damage them.
- Skipping brake, swivel, and tracking tests after installation.
Inspection and Maintenance Tips
Weekly checks should include tread wear, cracks, flat spots, loose hardware, and debris wrapped around axles. Test brakes and swivel locks, and listen for grinding, clicking, or unusual vibration. Each month, inspect mounting plates, stems, bolts, welds, and bearings. Confirm that loaded equipment rolls straight and that wheels are not damaging floors or catching at thresholds. Replace damaged components before they reduce control or create instability.
Questions to Ask Before Buying
- What is the maximum working load, including contents?
- Which floor surfaces and transitions will the equipment cross?
- How many times per day will it move?
- Does the route include ramps, rough areas, or outdoor travel?
- Are quiet operation, washdown, heat resistance, or corrosion resistance required?
- Does the mounting style fit the existing equipment?
- Can replacement wheels, brakes, and hardware be identified easily?
Final Takeaway
The best caster is not automatically the largest, hardest, or most expensive option. It is the one that fits the load, floor, route, environment, mounting requirements, and daily movement pattern. A careful selection process can make equipment easier to move, quieter to operate, and safer for the people who rely on it every day.

Whether your goal is to get the best value for your current vehicle or secure a reliable pre-owned car in Austell, Georgia, understanding the local market is key to avoiding costly missteps. When it comes to selling used cars Austell GA, applying proven strategies and leveraging local insights can make the process smoother and more rewarding. Helpful resources are available to guide both buyers and sellers, especially those unfamiliar with the area or transaction process.
As a growing suburb of Atlanta, Austell continues to see strong demand for well-maintained used vehicles. Preparing your car properly, marketing it effectively, and meeting Georgia’s legal requirements can give you a clear advantage. This guide walks through each essential step, from pricing and presentation to completing a seamless title transfer, so you can navigate the process with confidence.
Preparing Your Car for Sale
To stand out in Austell’s active market, your vehicle should make a great first impression. Begin by thoroughly washing and detailing the exterior and interior. Small touches such as repairing minor dents, changing the oil, and ensuring all lights and signals function properly can boost your car’s perceived value. According to Kelley Blue Book, vehicles presented in top condition often sell faster and attract better offers. Taking clear, well-lit photos from several angles, including the dashboard’s odometer, will give buyers more confidence and increase your listing’s attention.
Pricing Your Vehicle Competitively
A reasonable price is crucial if you want to attract legitimate buyers. Research the value of your vehicle’s make, model, year, mileage, and condition using free online tools such as Kelley Blue Book or Edmunds. Compare your car to similar local listings in the Austell area to ensure your price is competitive yet fair. Remember that overpricing can cause your listing to stagnate, while underpricing can result in lost value.
Advertising Your Car Effectively
Writing a detailed, fact-based description of your car helps set clear expectations and builds trust with buyers. Mention upgrades, service records, new tires, and other selling points. Posting your listing on popular platforms like Facebook Marketplace, Craigslist, or Autotrader increases your reach, especially in competitive areas like Austell. Always use clear language and be transparent about your car’s condition. As reported by Consumer Reports, listings with high-quality images and accurate details attract more inquiries and higher offers.
Meeting Potential Buyers Safely
Your safety comes first when meeting interested buyers. Arrange to meet in busy, public places during the day, such as shopping center parking lots. Consider bringing a friend or family member along for added security. Allow test drives only if the buyer has a valid license and current proof of insurance. Make sure to ride along or retain a copy of their ID for the duration of the test drive.
Understanding Georgia’s Legal Requirements
Both buyers and sellers must comply with Georgia’s rules for used-car sales. Sellers need to provide a clear, signed vehicle title and a bill of sale. Once the transaction is complete, cancel your old registration and remove the license plate from the car. Buyers are responsible for registering the vehicle in their name and paying any applicable taxes and fees at the local DMV. For official guidance, refer to the Georgia Department of Revenue.
Tips for Buyers in Austell
Shoppers should begin by researching target models and price ranges, using local listings for comparison. When you find a potential vehicle, run the VIN through a service like Carfax for a history report. Have a trusted mechanic inspect the car before finalizing the deal. Steer clear of offers that seem unusually low and always verify the seller’s identity and ownership documents to avoid scams. Patience and diligence can lead to better deals and safer purchases.
Utilizing Local Resources
Austell is home to several reputable used-car dealerships and independent lots that may offer certified pre-owned vehicles and extended warranties. In addition to online marketplaces, check local bulletin boards and community social groups for off-market deals. For further research and reviews, consult leading guides such as the Cars.com Research Center to compare vehicles and find pricing trends specific to the Atlanta metro area.
Conclusion
Completing a successful used car transaction in Austell, GA, is easier with the right preparation, knowledge, and legal compliance. Whether buying or selling, focusing on honest representation, competitive pricing, and local resources will lead to a smoother, more satisfactory experience for all parties involved.
-

 BLOG11 months ago
Konversky: Next‑Gen AI‑Powered Digital Communication
-

 BLOG10 months ago
Fesbuka: How to Maximize Your Experience on the Platform
-

 TOPIC1 year ago
Aiyifan: The Digital Platform Transforming Access to Asian Entertainment
-

 TOPIC1 year ago
Doujindesu Explained: Legal Concerns, Privacy Risks, and the Future of Fan-Made Manga Culture
-

 TOPIC1 year ago
TalktoWendys: The Complete Guide to Wendy’s Customer Feedback Survey
-

 TOPIC1 year ago
Molex 39850-0500: An In-Depth Overview of a Key Connector Component
-

 TOPIC12 months ago
v4holt: Revolutionizing Digital Accessibility
-

 TOPIC1 year ago
Moviepire: A New Digital Frontier in Curated Cinema and Audience-Driven Film Culture